Connecting – today and beyond
Connecting – today and beyond
English

Search
Products
Achieve perfect ribbon splices with HUBER+SUHNER OptiRibbon cables
Splicing fiber optic cables may seem like a technical task, but it’s an essential process for ensuring smooth, high-quality connections in any fiber network. When it comes to working with HUBER+SUHNER OptiRibbon cables, precision and attention to detail are paramount. Even a small misstep can lead to performance issues, which is why following the right splicing procedures is so critical.
This guide walks you through the optimal process for splicing OptiRibbon cables to ensure flawless results every time. Based on extensive internal testing and years of operational expertise from HUBER+SUHNER, these best practices are designed to be applicable to all major splicing machines, ensuring you can achieve top-tier results no matter what equipment you’re using.
Step-by-step guide to flawless ribbon splices
1. Start with proper fiber positioning
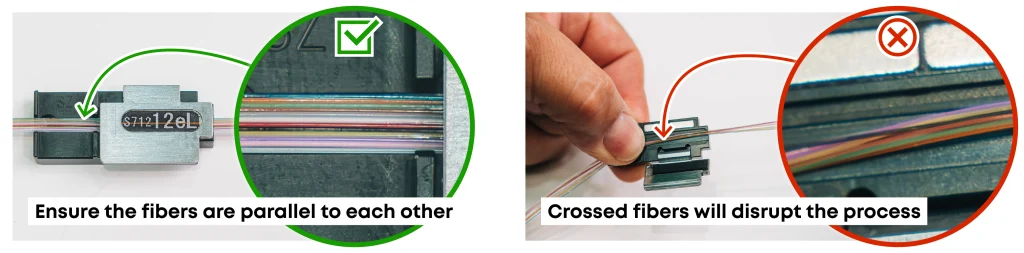
The first step in successful splicing begins with careful fiber handling. Lay the fibers cleanly and flat in the provided holder. Ensure the fibers are parallel to each other- crossed fibers at this stage will disrupt the entire splicing process. Double-check the fiber arrangement both vertically and horizontally before moving forward.
2. Mastering the stripping tool
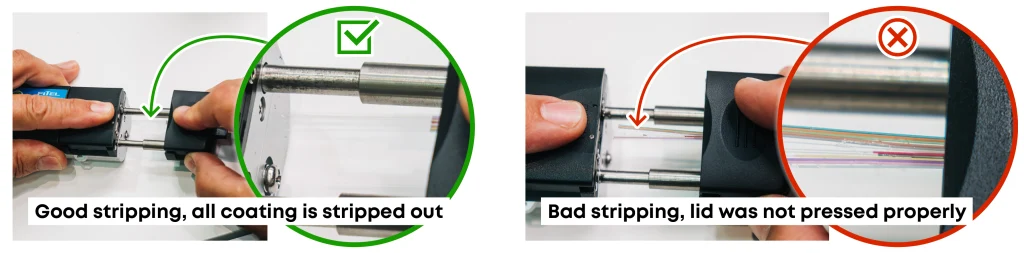
Next, you’ll need to insert the fiber holder into the thermal stripping tool. For the stripping process to go smoothly, ensure that both lids of the tool are firmly pressed together. A secure fit is crucial, as an improperly positioned holder or uneven pressure on the lids can displace the fibers, leading to incomplete or damaged stripping. Remember: a firm but not excessive press on the lids is key.
3. Clean the tool, clean the fiber
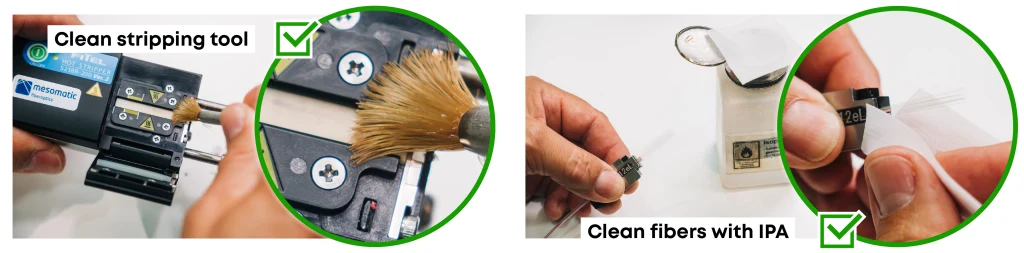
Once the stripping process is complete, don’t skip the cleaning stage. Regularly clean your stripping tool according to the manufacturer’s instructions to keep the process flawless. Similarly, clean the stripped fibers with isopropanol to remove any leftover stripping residues. This helps prevent any impurities from affecting the splice quality.
4. Verify fiber alignment post-stripping
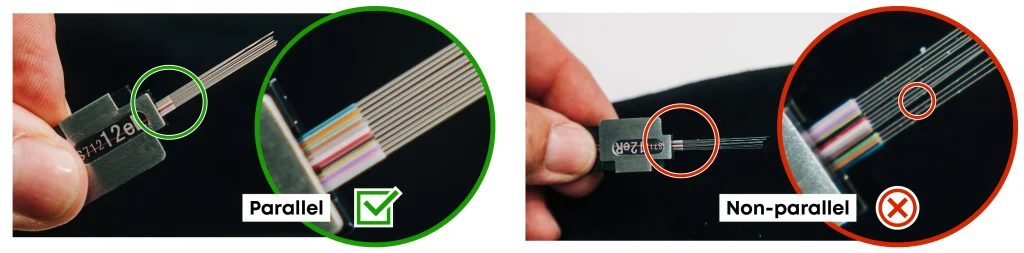
Before moving on, take a moment to recheck the fibers. After stripping, ensure the fibers are still parallel and undisturbed. Any misalignment here can throw off the entire splicing process, so it’s essential to catch these small errors early.
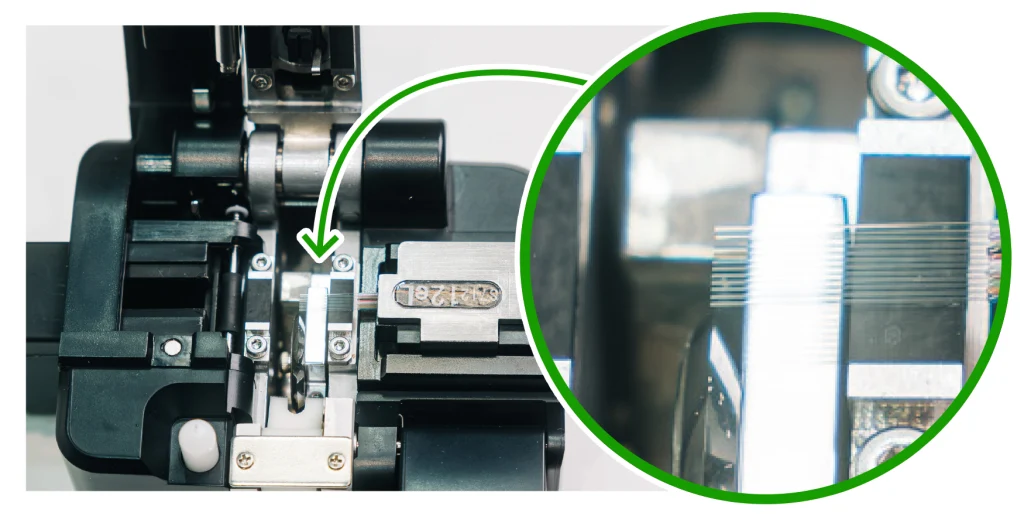
5. Cleaving the fibers with precision
When cleaving the fibers, make sure they’re properly aligned within the cleaver. Crossed or misaligned fibers will cause cleaving problems, so it’s important that everything is positioned precisely. If the fibers are angled incorrectly in the holder, the cleaving process could deviate, so take care to ensure accuracy.
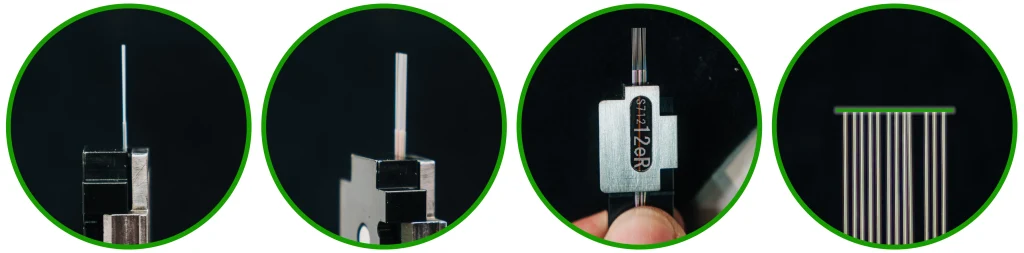
6. Post-cleave inspection
Once the fibers are cleaved, inspect them again for alignment. They should remain parallel, straight, and undisturbed in the holder. If any issues are detected, restart the process from the beginning to ensure the cleave is perfect.
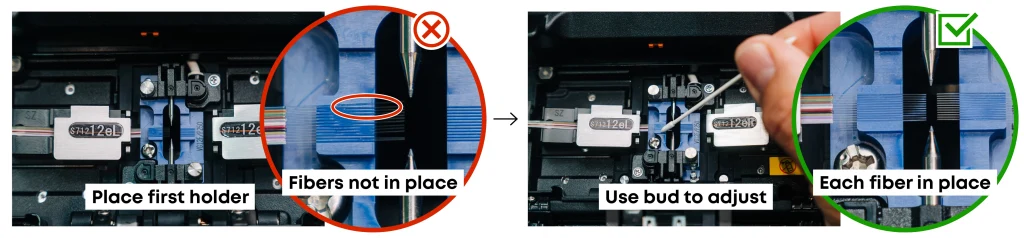
7. Proper fiber placement in the splicer
Now, it’s time to load the fibers into the splicer. Position the fiber holder in the splicer’s V-grooves, making sure each fiber is securely seated. If a fiber isn’t sitting properly, gently adjust it with a cotton bud to ensure it’s in place. Correct positioning at this step is essential for a successful splice.
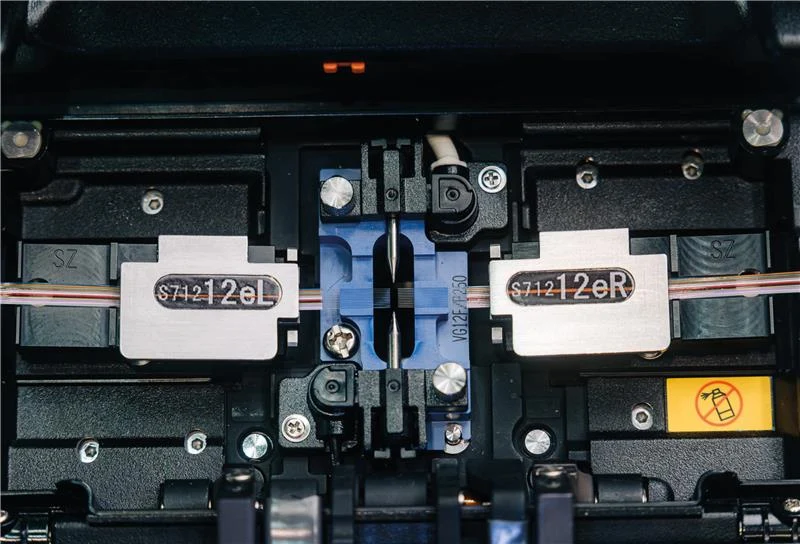
8. Insert the second fiber holder
After placing the first holder, the next step is inserting the second one. Again, ensure all fibers are clean, parallel, and properly aligned in the V-grooves. Using an auxiliary tool can help secure the fibers in place and prevent them from shifting during the splicing process.
9. Close the splicer flap with care
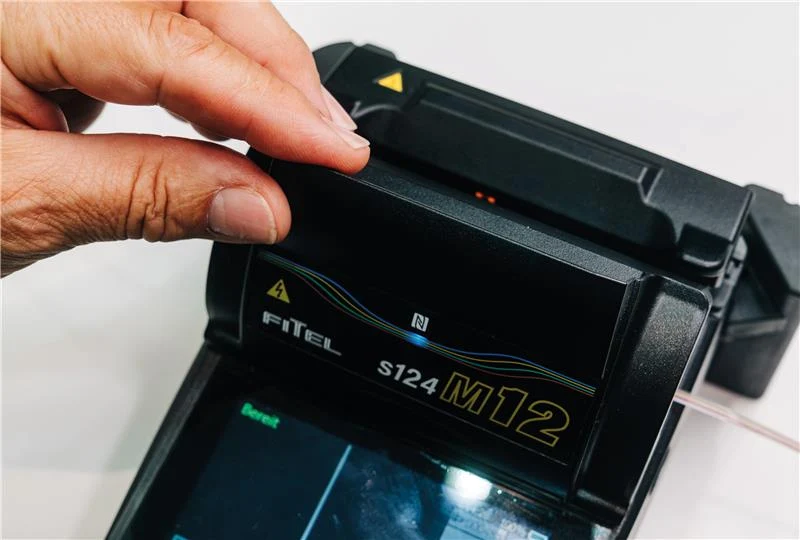
Even though many splicers feature automatic closing, it’s recommended to close the flap manually. This extra step ensures the fibers don’t jump out of the V-grooves when the flap is shut, preventing errors in the splicing process.
10. Double-check fiber positioning before splicing
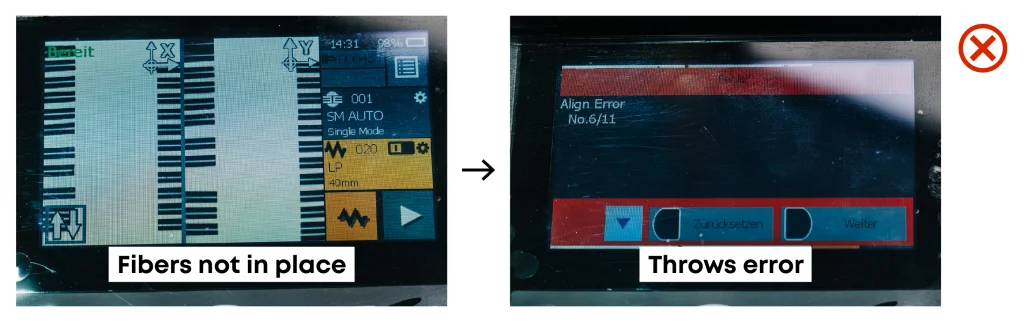
Once the flap is closed, check the splicer’s screen to confirm the fibers are properly aligned. The fibers must lie perfectly in the V-grooves to ensure an optimal splice. If everything looks good, proceed with the automated splicing process as per the machine’s instructions.
11. Quality check after splicing
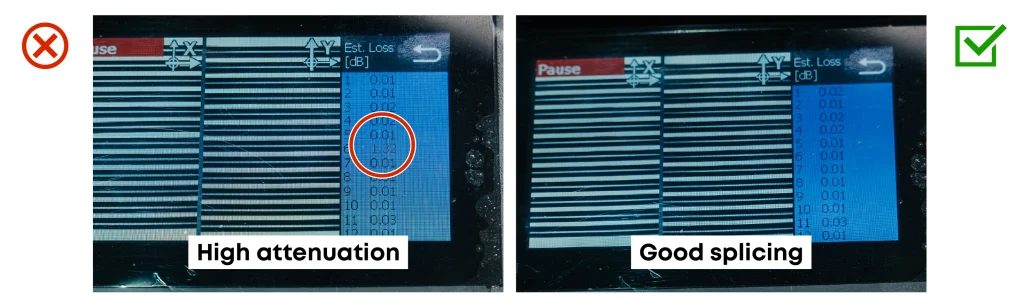
After the splicing process completes, it’s essential to verify the quality of the splice. Most modern splicing machines offer a real-time quality check, but it’s always a good idea to double-check the results manually to ensure everything is perfect.
11. Quality check after splicing
By following these carefully outlined steps, you can ensure that every splice of HUBER+SUHNER OptiRibbon cable is accurate, reliable, and error-free. Whether you’re working with fiber optic networks, telecommunications infrastructure, or any other system requiring top-notch connectivity, getting the splicing process right is non-negotiable.
Keep these best practices in mind, and you'll not only minimize errors but also maximize the reliability and performance of your fiber optic connections.
Related blogs









Get in touch
Do you have questions?
We will gladly assist you. Send us a message or find your local contact:
Contact formGo to contact form
Locations worldwideSee locations